
Fiberglass is a strong and lightweight material that is used in many different applications, from boats to cars. It is also used in a variety of repairs, such as repairing cracks and holes in boats, cars, and other fibreglass products. While it is relatively easy to repair these items, there are a few basic steps that must be followed to ensure a successful fiberglass repair.
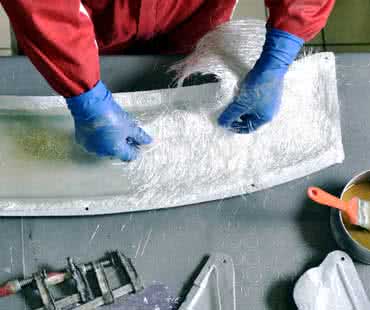
Image Source: Google
Step 1: Clean the Affected Area
The first step in any fiberglass repair is to clean the area that needs to be repaired. It is important to remove any dirt, debris, and contaminants from the area. This can be done with a soft brush and a mild soap solution. After the area is thoroughly cleaned, it should be allowed to dry completely before the next step.
Step 2: Cut the Damaged Area
Once the area is clean and dry, it is time to cut away the damaged area. This can be done using a sharp utility knife, or by using a special fiberglass cutting blade. It is important to be careful when cutting, as it is easy to damage the surrounding fiberglass. After the damaged area is cut away, it is important to check for any jagged edges or other imperfections that need to be sanded down.
Step 3: Prepare the Patch
Once the damaged area is removed, it is time to prepare the patch for repair. This involves cutting a piece of fiberglass that is slightly larger than the area that needs to be repaired. The patch should be cut to fit the contours of the area that needs to be repaired. Once it is cut, it is important to sand down any rough or jagged edges.